This article is part of my guide to recording your piano at home.
If you’re looking for a simple way to improve your piano recordings without getting into anything technical, a plug-in microphone is one of the easiest upgrades you can make.
In this article, I’ll show you how the Shure MV88 works, why it makes such a difference, and how you can use it to get a much better sound from your recordings.
If you’re completely new to recording, you might also want to start with my full guide here:
👉 How to Record Your Piano at Home (Easier than you might think)
Great camera but not so good microphone
Whilst the video tends to be really good (all things considered), the audio isn’t so great as the built in microphone is mainly designed to capture your voice in the optimum way for making phone calls.
When you record the piano, you have a really wide range of sounds to capture – from soft, high notes to thundering bass notes (or indeed from delicate bass notes to piercing octaves at the top of the piano). The only real solution is to have a different way of capturing the audio.
What options do you have?
I did at first think about some type of Home Studio set up (as I’d seen people like Paul Barton and Josh Wright speak about).
A full audio set up would involve several pieces of equipment. For a typical Home Studio type set up (which is predominantly focussed around a computer) you would need:
- Computer
- Microphone(s) – one or more reasonable quality microphones
- An Audio Interface – you can’t plug a microphone straight into your computer so you plug the microphone into the interface and the interface into the computer
- Microphone stands and cables
- Monitor Speakers – specialist speakers used to play back from the computer – or Headphones
Can you do it on a budget?
However, whilst researching on Google, I was amazed to see that in fact there is a really wide variety of microphones available at many different budget points that plug directly into your phone (with or without an inexpensive adaptor). Here, suddenly you no longer need the Computer, the Audio Interface or the Monitor Speakers … with a single, plug and play microphone you can completely change the game.
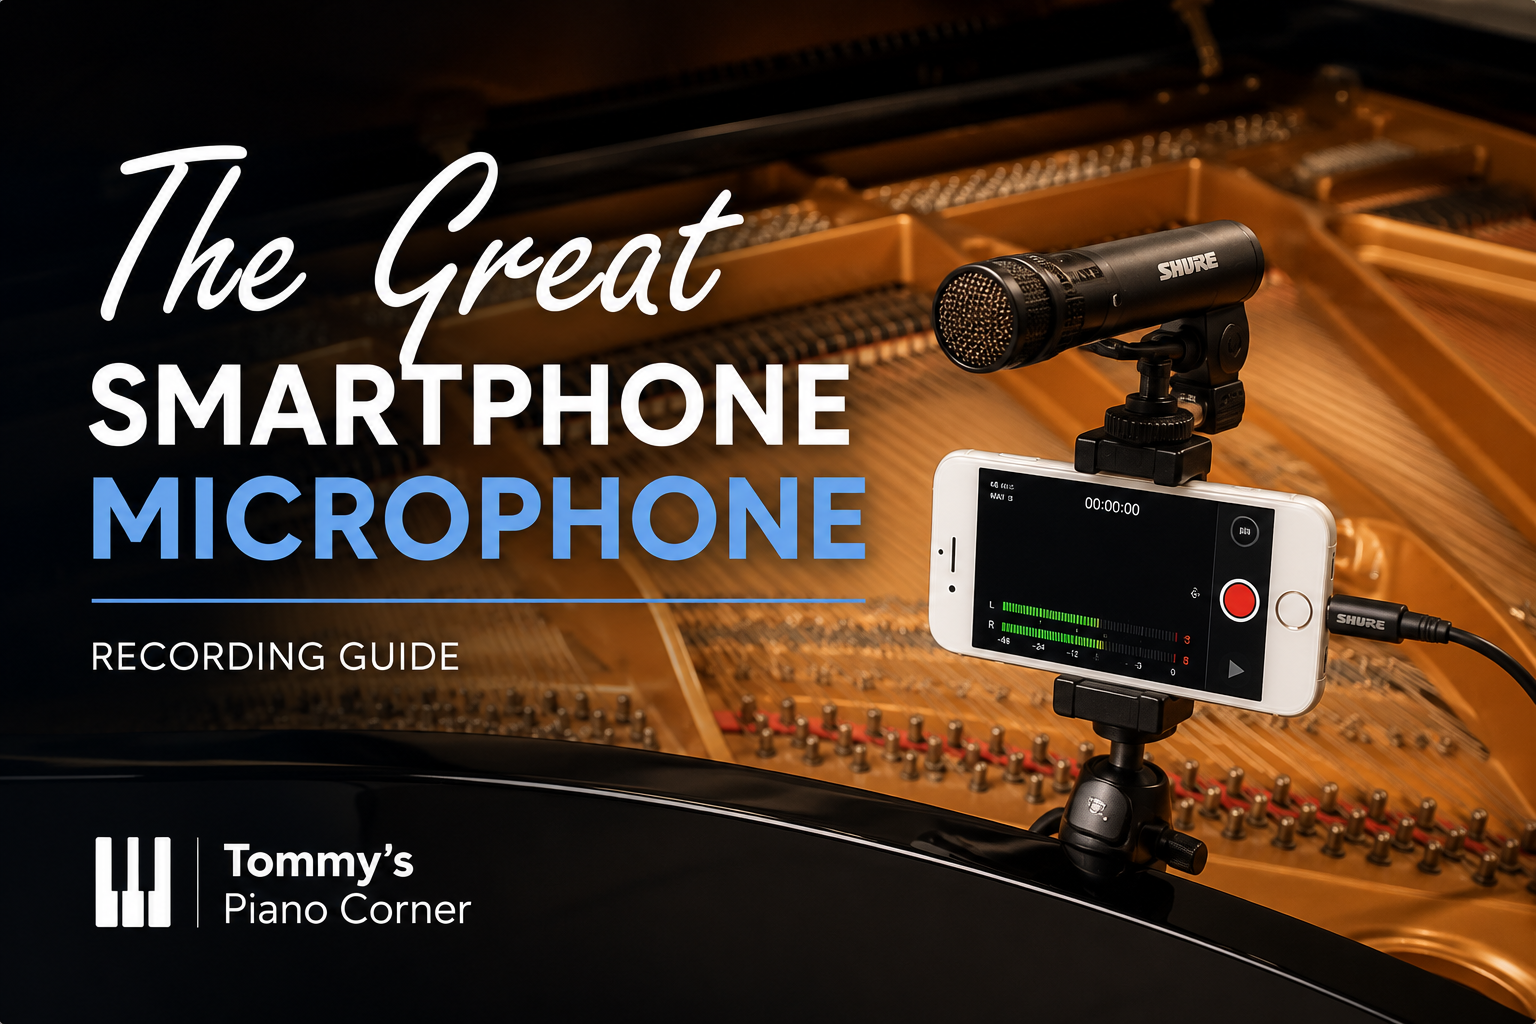
My recommended microphone from this style is one of the MV88 family. We have the MV88 which is now USB-C (the previous Lightning Connection model has been phased out) or the MV88+ which is provides both a USB-C and a Lightning connector so will work with all devices. At the point of writing, the MV88+ is somewhat more expensive than the MV88 so it is worth looking at both depending on budget.
Shure MV88 – USB-C
This is a stereo, condenser microphone which plugs directly into the USB-C port on the phone or tablet and has excellent reviews. If you’re planning to do a lot of recording, then you’ll soon get your money’s worth.
Take a detailed look at the Amazon link below. Amazon will also help you here by suggesting what people also looked at when considering this microphone.
As an Amazon Associate I earn from qualifying purchases.

A compact, high-quality stereo microphone designed for mobile recording, offering multiple polar patterns and excellent sound clarity for musicians and content creators.
View on Amazon
This means I may earn a small commission if you buy through these links, at no extra cost to you.
Shure MV88+ (USB-C and Lightning compatible)
This is also a stereo condenser microphone. It has one important advantage in that it works also with Android/Windows devices, new iPad and iPhone models which have a USB-C connection as well as older lightning connector iPhones.

A compact, high-quality stereo microphone designed for mobile recording, offering multiple polar patterns and excellent sound clarity for musicians and content creators.
View on Amazon
See the difference for yourself
If you have your headphones to hand, try listening to my YouTube Video from 09:00 minutes … it has one recording using the phone’s built in microphone and then the same piece recorded using the Shure MV88 microphone.
If you’re interested to see how the MV88 and the MV88+ compare side by side, you can check out this shoot-out video on my YouTube channel.
I’m sure you can hear we already have a dramatic improvement in terms of audio quality – but it doesn’t stop there.
Get the App
Shure provide a very easy to use App that unlocks the amazing capabilities of the Microphone. If you are now seriously considering such a microphone, then I recommend you take a quick glance at this article which takes you take control of your Shure MV88 Microphone.

You certainly don’t need to understand anything, just a couple of quick tricks. If you do want to go deeper, then I recommend my Online Course ‘Audio Recording for Classical Musicians’ which walks you through step by step.
A Small Tip That Makes a Big Difference
While the MV88 is a great upgrade, the biggest improvement comes from how you use it.
In particular, if you combine a microphone like this with recording your audio separately from your video, you can achieve a much more professional result.
I’ve explained exactly how to do that here.
Tips to remember
Two top tips though to definitely remember
- put your phone onto ‘Airplane’ mode to avoid any noisy bleeps whilst you record (I’ve forgotten to do this more than once and it’s very annoying).
- make sure you have enough free memory on your phone – video file sizes are surprisingly big
Going to the next level
Once you have a microphone, there are lots of other things you can do. What about adding Reverberation and Equalisation? Do you have trouble getting a perfect take in one go? Why not edit out mistakes!
For a detailed guide on not only recording your piano but also on the types of audio editing mentioned above, I have created courses that walk you through this step by step.
Most importantly, have fun!
Where to Go Next
If you’d like to take this further, the next step is learning how to record audio and video separately, which allows you to get the best possible sound from your microphone.
👉 Recording Audio and Video Separately
Or, for a complete overview of recording your piano:
👉 How to Record Your Piano at Home (Easier than you might think)

